- Install and configure the Metronome SDK.
- Send usage events to Metronome, laying the foundation for consumption-based billing.
- Create a billable metric to define how Metronome should aggregate and measure usage.
- Create a customer in the system and associate them with usage events.
- Set up pricing and packing for your product.
- Create a contract for the customer, enabling automatic invoice generation based on their usage.
SDK features
Each SDK GitHub repository contains detailed documentation, examples, and resources to help you make the most of Metronome in your applications: Core SDK features include:- Strong typing of Metronome endpoints and objects enhance developer productivity with better autocomplete and IDE support for Metronome objects.
- Pagination support simplifies the process of retrieving and managing paginated data from Metronome services.
- Automatic retry support by default retries each request upon failure up to three times. You can configure it to any number of retries. Use this to automatically handle transient errors and network issues without needing to implement retry logic.
1. Install and configure the SDK
First install and configure the SDK in your environment:METRONOME_BEARER_TOKEN. In this example, it’ll be passed as an argument to the constructor instead.
2. Send usage events
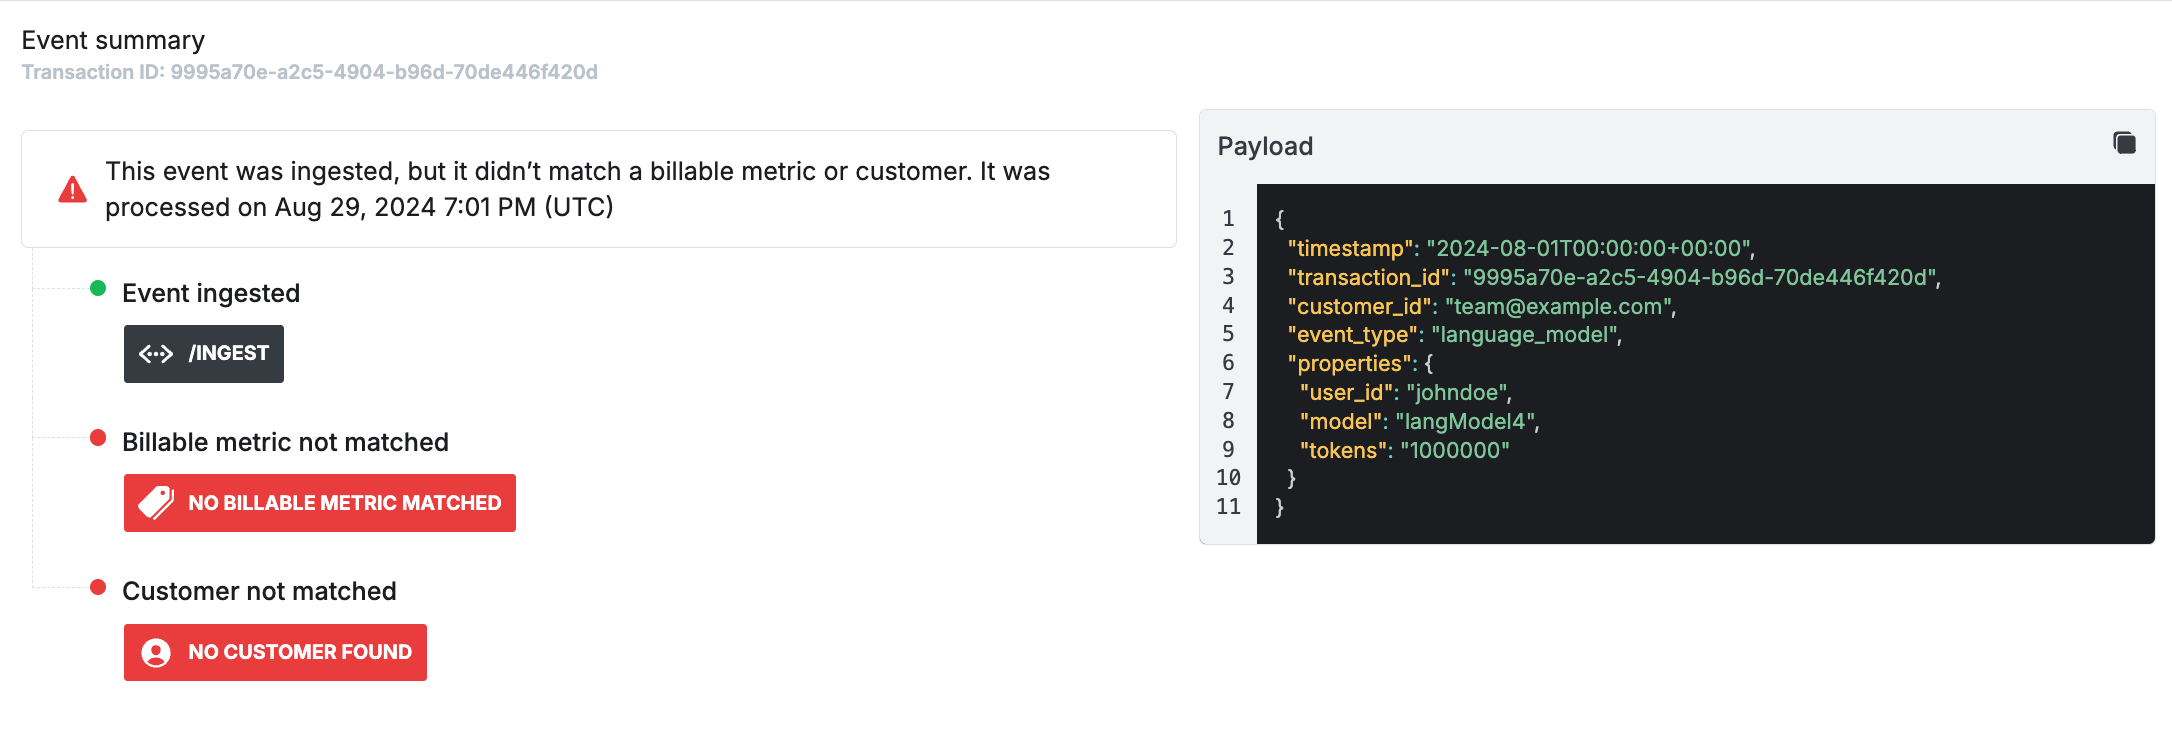
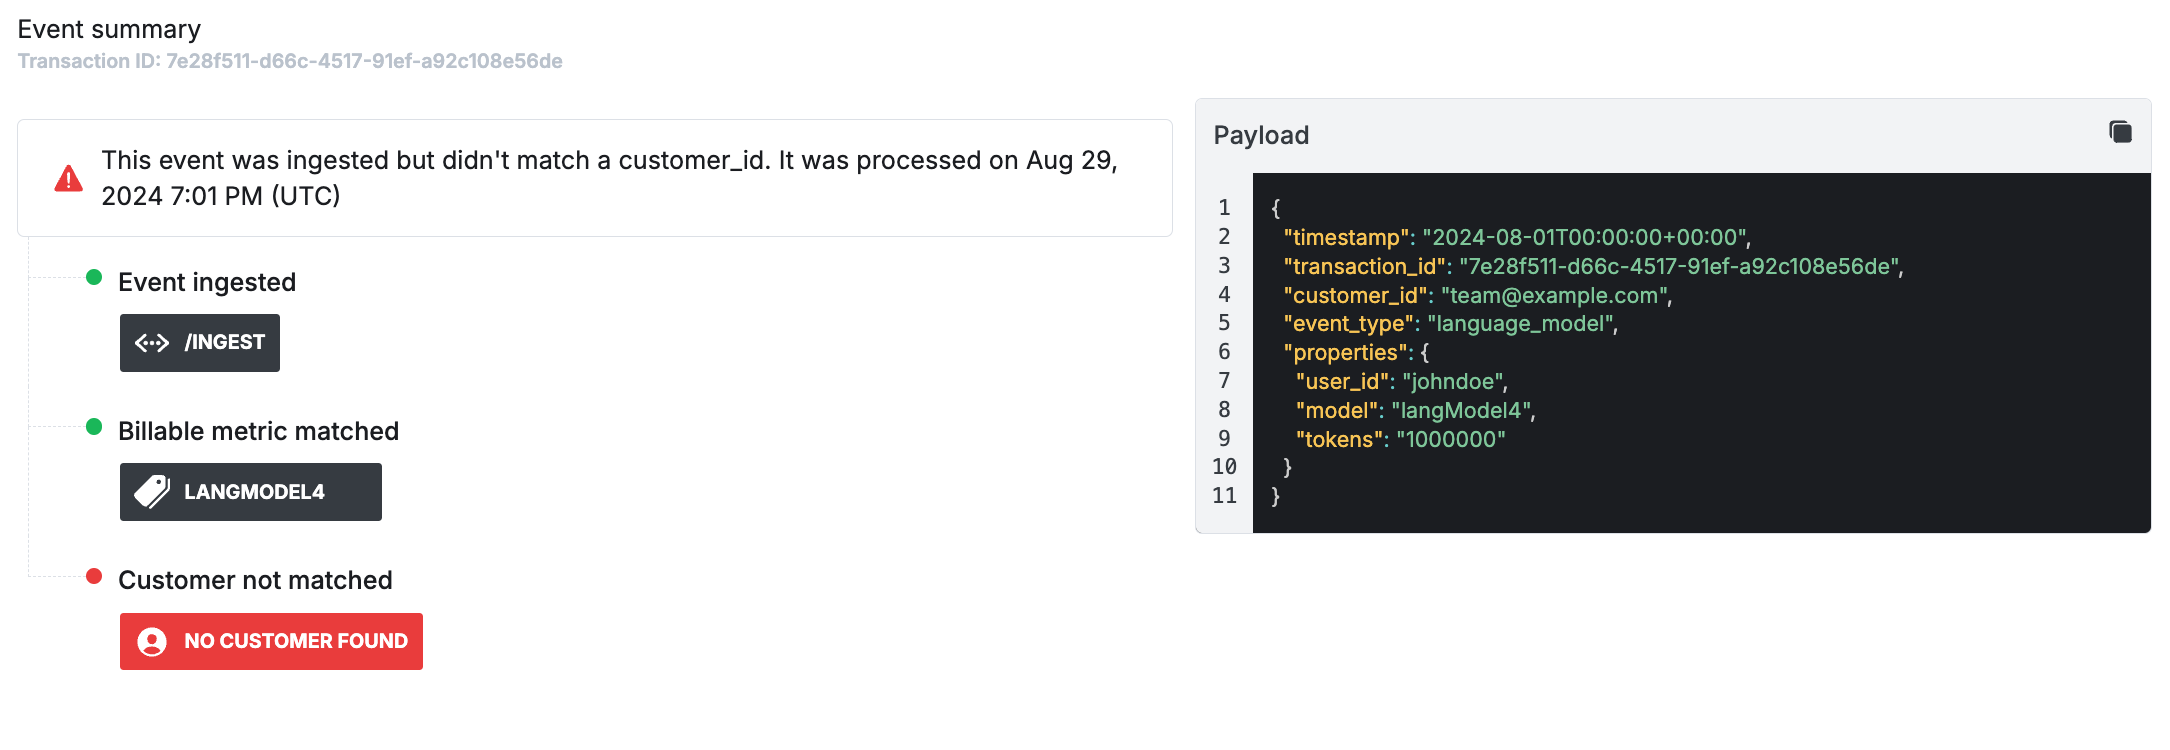
The usage-based billing model builds upon captured usage data from users on your platform. Metronome accepts usage payloads of all formats through the /ingest endpoint. Use the SDK to send data to Metronome:usage, allows you to pass in multiple event payloads in a request. Metronome supports passing up to 100 events within a single request.transaction_id, provides Metronome with the unique idempotency key for the event. Metronome deduplicates based on this ID, allowing you to send events potentially many times without worrying about double-charging your customers.timestamp, the time when the event occurred. Send in events with any timestamp up to 34 days in the past.customer_id, the customer ID in Metronome or any other customer identifier you want to define. For example, customer email or internal customer ID within your platform. Later steps show how to define these custom identifiers for your customers in Metronome.event_type, an arbitrary string that you can define within the request.properties, an arbitrary set of data to include within the payload for metering and grouping within Metronome.
3. Create a billable metric
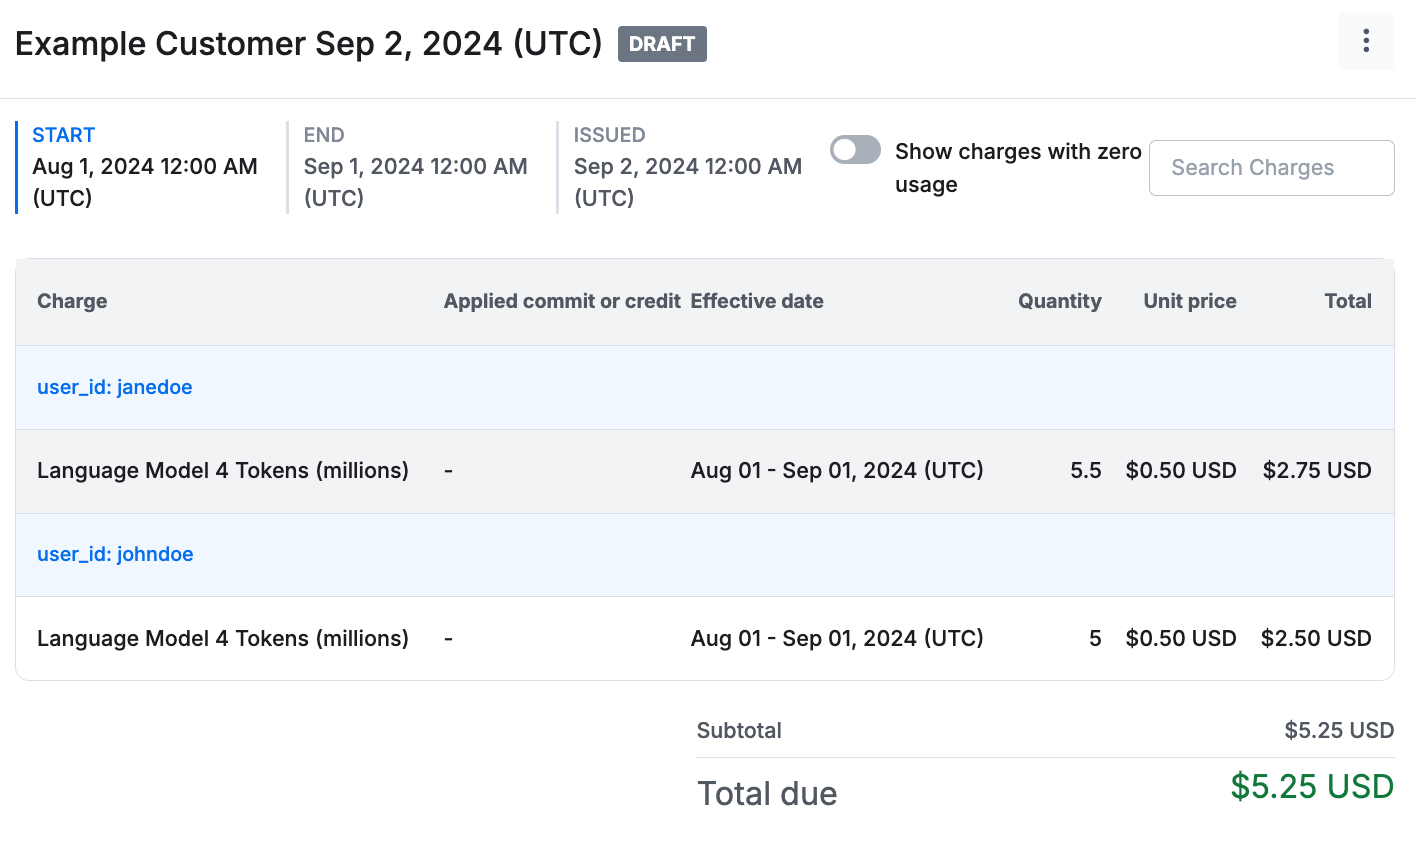
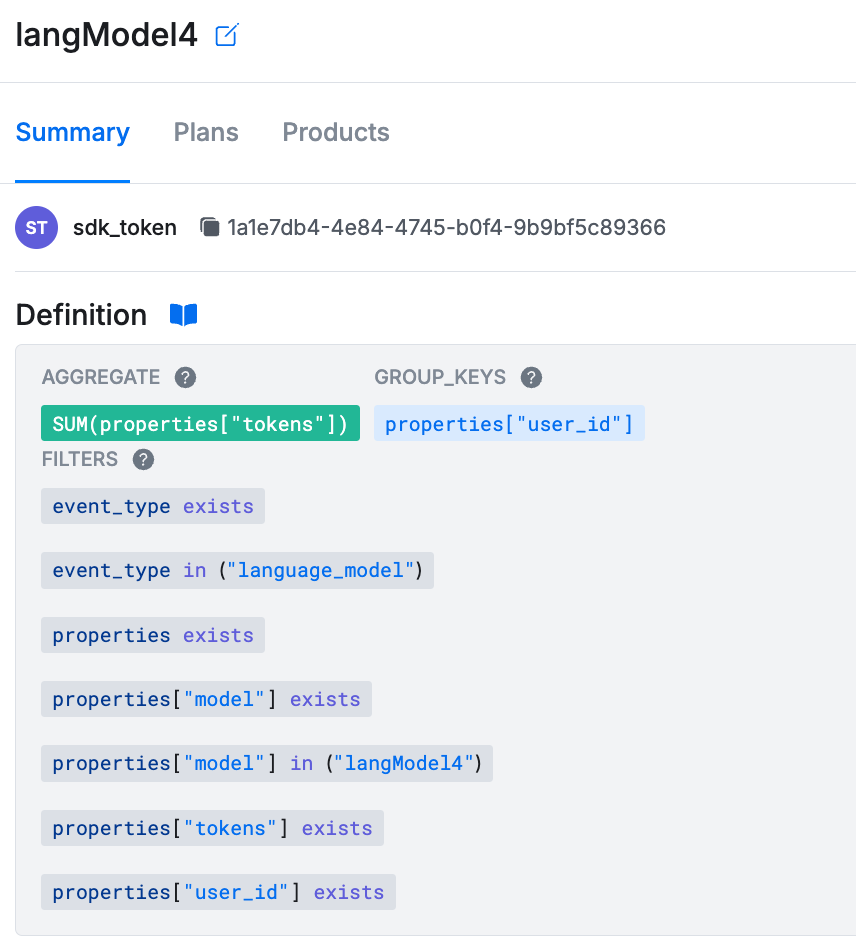
A billable metric describes a per-customer aggregation over a subset of usage events. By configuring a billable metric, you instruct Metronome how to match usage events to products you charge for. Here’s an example billable metric configuration that matches against the usage event sent in the previous example:name, the name to give your billable metric.event_type_filter, the set of values that matched against theevent_typefield in the usage events. Omit this if you want to match against all event types.property_filters, the set of properties you expect to find on the usage payload. If you mark a property asexists=Truein the billable metric definition and the property not found on the payload, the billable metric won’t match to the event.aggregation_key, used to define the property with the relevant value to aggregate on.aggregation_type, used to tell Metronome how to aggregate the values specified by theaggregation_keyas they come into the system. Supported operations areSUM,COUNT, andMAX.group_keys, used to define properties to separate the usage data into different buckets, similar to agroup byclause in SQL. The example above setuser_idas a group key, so you can display the invoice separated by the amount of tokens that each user consumed.
4. Create a customer
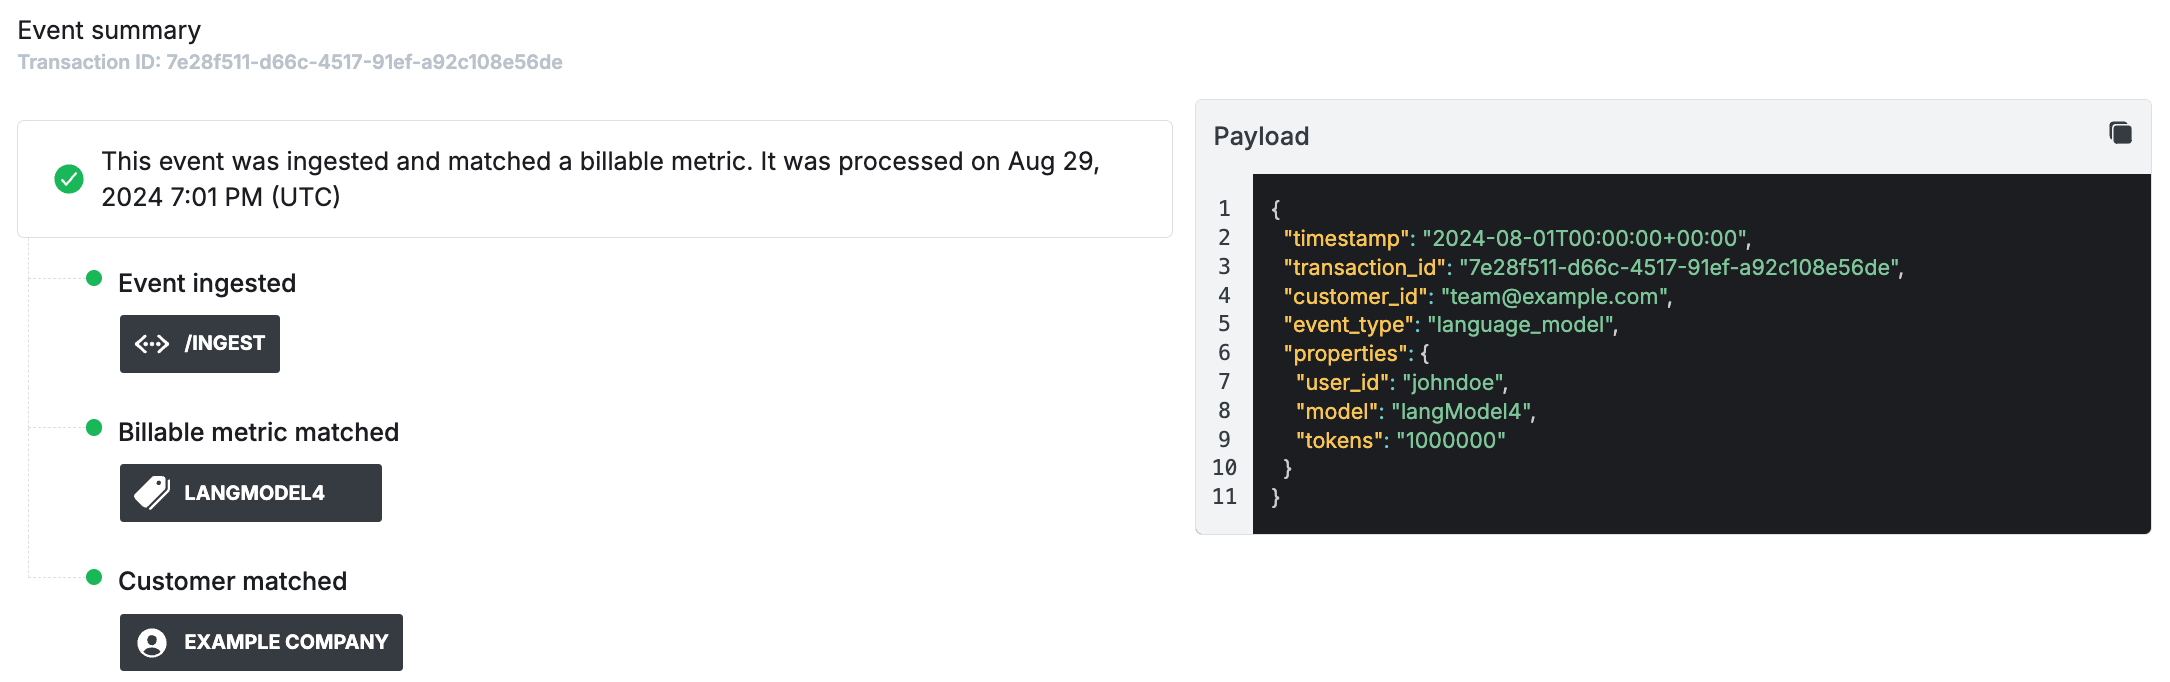
Usage events impact billing for customers, so the next step is to create a customer in Metronome. Use the SDK to create a customer, similar to this example:name, the display name for the customer in Metronome.ingest_aliases, a list of identifiers used to match a Metronome customer against a usage event. Ingest aliases are useful if you want to start flowing in usage for customers before they’re created in Metronome. To do this, use the ID from your application’s customer table.

team@example.com, so the previous event gets matched correctly. After you set the customer up for invoicing in the next section, this event contributes to their current invoice.
5. Set up pricing and packaging
Next, set up prices and packaging, defined using products and rate cards. In the example, you want to charge your customer based on their usage oflangModel4 at a rate of $0.50 per 1 million tokens.
The first step is to create a product for your billable metric. A product is where you configure the billable metric for presentation on the eventual invoice. It’s also where you can associate the metric with items in external systems, like the Stripe customer ID. Learn about the configuration options for products in the API docs for the create product endpoint.
Create a product associated to the billable metric, similar to this example:
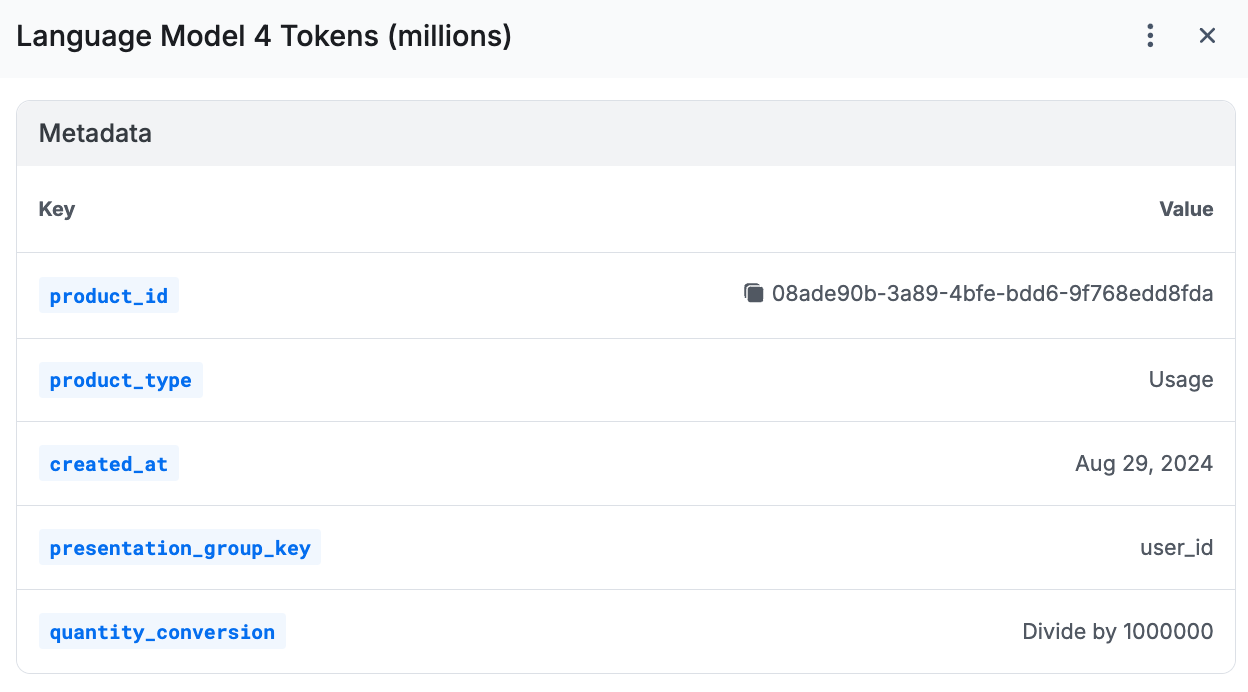
name, the name of the product that appears on the invoice. Often a cleaned presentation of the billable metric name (Language Model 4 Tokens (millions)versuslangModel4).type, determines how a product gets charged. Supported types includeusage,fixed,composite(for percentages of other usage products), andsubscription.billable_metric_id, associates the product presentation with an existing billable metric.presentation_group_key, used to group line items on your invoice by a given property value.quantity_conversion, used to multiply or divide quantities displayed on the final invoice. For example, charge by million tokens (mTok) while sending in usage at the individual token level.
entitled, a boolean that indicates whether a rate shows up by default on a customer’s invoice. IfFalse, it won’t appear on a customer’s invoice unless overridden at the contract level.rate_type, used to configure how a rate gets applied as usage flows in. Supported values includeFLATorTIERED.price, the rate itself. For USD, values are in cents (for example,100= $1.00). Other currencies use whole units. See currency denomination for details.starting_at, used to set the time when the rate goes into effect. To evolve your rates over time, setstarting_atandending_beforedates to ensure smooth pricing updates.
6. Create a contract
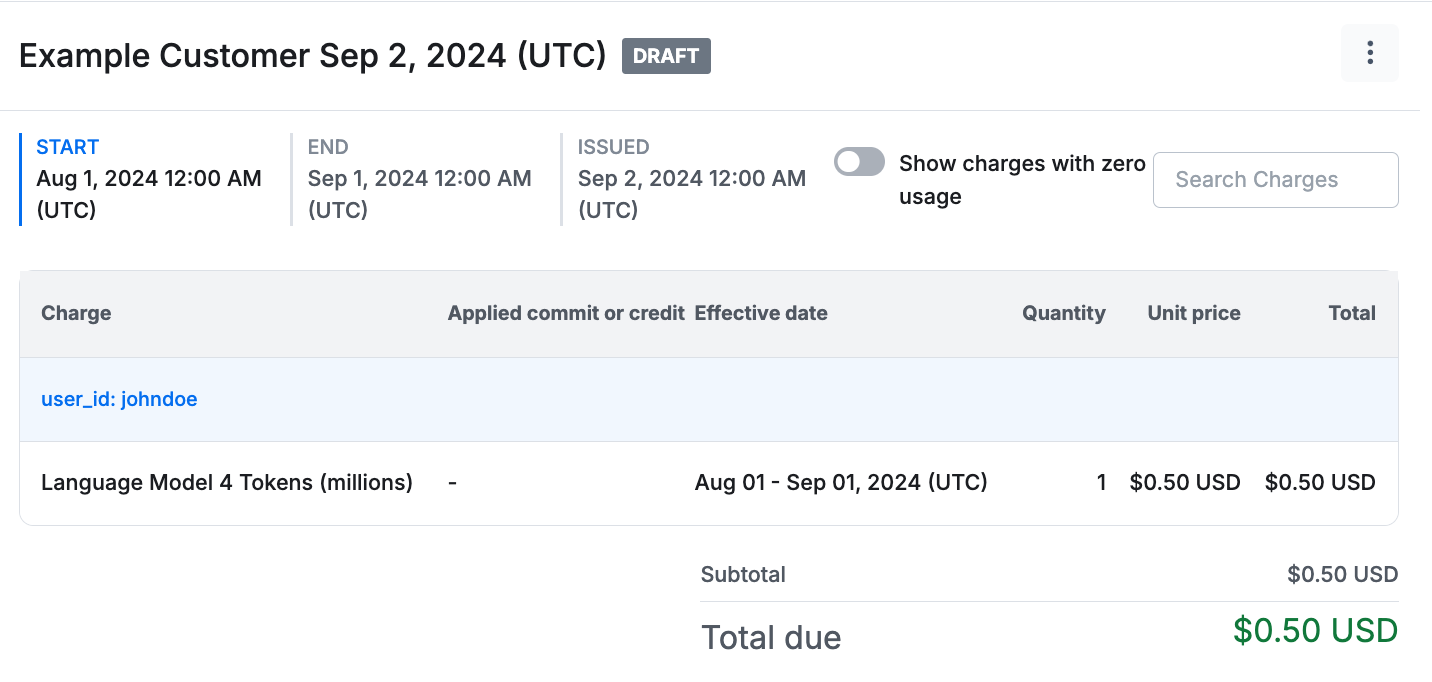
To start generating invoices for a customer, put them on a contract. A contract is an object that represents the terms a customer has agreed to pay, generally based on your rate card. At its most simple, a customer can have a basic contract where they pay the predefined list prices; this may cover many of your simple self-serve cases. If you have specific discounts or commits that a customer negotiated, configure these in the contract on top of the base list prices. Add your created customer to a contract, similar to this example that uses the Language Model List Pricing rate card:starting_at date. Usage data from the current period is visible to the DRAFT invoice. Line items on draft invoices update seconds after Metronome receives usage data.
For the new contract from the example, the previously sent usage of 1 million tokens got applied.